
Volume inspection of your scanned 3D object is fully automatic with SOL PRO. No need to export to third-party software for measurements and calculations. The software options make the process easily replicated to ensure measurement consistency.
All you need to do is perform a regular scan, save the 3D model, and the volume inspection result is readily available in cubic cm and cubic in.
The workflow below describes the simple steps needed for a successful volume inspection process.

Workflow
As an example, we have chosen to scan a cube, since the volume of this kind of shape is easily double-checked with a caliper.
Scanner position

The cube measures 7,4x5,9x2,7 cm (2,91x2,32x1,06 in), and this object size requires the scanner set in near position.
Learn more about near or far scanner position here.
Scanning mode
For volume inspection, we recommend that you start out by testing if scanning in Turbo scanning mode is accurate enough for your need. Scanning in Turbo scanning mode will save time, but at a slight cost of accuracy.
If you need more accuracy, then make test scans in Normal and/or High accuracy scanning modes, and choose which works best for you.
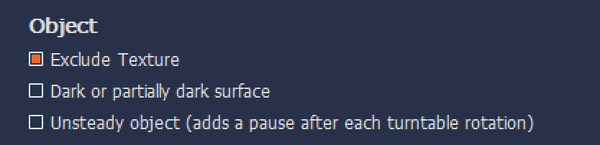
Exclude texture option
If you do not need the texture as part of your volume inspection, you can reduce the full scanning process time by 10-15% by checking the ‘Exclude texture’ option before scanning.
Start scanning
Follow the instructions in SOL PRO Creator software and complete the first scanning pass for your volume inspection.
VIDEO: Learn the full scanning process from this blog post featuring the video: A SOL PRO 3D scanning from start to finish.
How many scanning passes?
A scanning pass is a scanning done with the object placed in one orientation.
SOL PRO Creator can mesh up to five scanning passes, but you only need to make just as many scanning passes necessary to cover the entire object’s surface once.
For volume inspection, you would typically need at least two scanning passes, so that the part of your object that was facing down in the first scanning pass is also scanned.

Save your 3D model
When you have scanned sufficient orientations, you name and save the file, which then automatically opens in the SOL PRO Viewer software.
Volume inspection
The volume of your 3D model is read at the bottom of the screen in SOL PRO Viewer alongside other model information and measurements.
This applies to all 3D models opened via the Collection in SOL PRO Viewer.

View the 3D model in Sketchfab
Good to know
Optimize alignment option
A bad alignment will give you an inaccurate volume result. So, in case your object is not aligned well enough by the automatic meshing, you may need to use the Optimize alignment option.
VIDEO: See how to optimize the alignment in this blog post: Scanning symmetrical objects using ‘Optimize alignment’
Comparisons
If your volume inspection includes comparison of various 3D models, then make sure that they have been scanned using identical parameters (scanning mode, scanner position, no of scanning passes, etc.).
Questions about volume inspection and SOL PRO 3D scanner?
We’re happy to help: Just contact us.
Where to buy SOL PRO
Fill out the form on our SOL PRO product page and we'll get right back to you.