When SOL 3D scanner first hit the shelves in 2019, there were a lot of reviews of the technical specs and the user expectations.
Now SOL 3D scanner is recognized for its ease of use and value for money compared to other 3D scanners in the same price range. It is seen as one of the most versatile, yet user-friendly 3D scanners.
Check out these third-party reviews of SOL 3D scanner.
Focusing on user need and pricing, Bollyinside rates SOL 3D scanner:
“SOL is a best 3D scanners that works well for the price and is made to scan small, detailed items. The scanner itself only weighs 7 pounds and can scan things that weigh up to 2 kilograms. Because it is so light, you can take it with you anywhere and use it as a 3D scanner. or scanning objects with a diameter of up to 100 mm and a height of up to 100 mm. for scanning things up to 170 mm in diameter and 170 mm in height."
Read the full review on bollyinside.com
About Bollyinside: Bollyinside provides you with the latest breaking news and videos from the global industries.
In its review of SOL 3D scanner, 3D Printing Industry is very pleased with the scanner's usability:
“We’re happy to confirm that when it comes to scanner calibration, ease of use and accessibility really are front and center here. [...] We’ve never come across a 3D scanning workflow this automated."
3D Printing Industry did an extensive series of accuracy and texture tests, and comes to the conclusion that:
"What the SOL really provides is value for money – pure and simple."
Read the full review on 3dprintingindustry.com
About 3D Printing Industry: 3D Printing Industry (3DPI) is a global media company providing a dedicated resource for anyone interested in 3D printing and 3D scanning — two fields of technology that are rapidly growing in relevance and application across industrial and consumer sectors.
All3DPs annual Buyer's Guide to Best 3D scanners start with:
"From entry-level to professional 3D scanners, backed by full reviews. Check out our buyer’s guide to find the best 3D scanner for your needs."
All3DP mentions the SOL 3D scanner as :
"It’s geared towards hobbyists, everyday makers, and entrepreneurs who want to scan small- to medium-size objects (that’s something 1-inch square to something about 7 in x 7 in)."
Read the full review on All3PD
About All3PD: All3DP.com is the world’s leading 3D printing magazine with more than 2 million users per month. Aimed at both beginners and professionals, All3DP.com provides compelling content that is useful, educational, and entertaining.
3Dsourced lists their absolute top picks for low-cost 3D scanners that work great.
Their recommendations are based on:
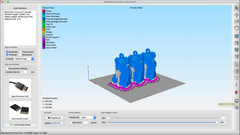
"Specialized 3D scanning software comes with the SOL scanner, easily enabling you to export object scans in either STL or any other file formats, for either 3D printing in a 3D slicer, or importing into a 3D CAD software tool for editing and optimizing.
"With Facebook now letting anyone upload 360-degree images of their products that customers and fans can view, it has never been more important to have 3D scans of your best-sellers, with the Sol perfectly suited for this."
Read the full review on 3dsourced.com
About 3Dsourced: We've covered the 3D printing industry since 2017, tested over a dozen of the world's most popular 3D printers, and we're dedicated to being the most informative 3D printing site in the world to help democratize the technology.
heavy.coms ranks SOL as the 2nd best 3D scanner available in 2022, and explains that the pros are: High accuracy for the price, Easy to maneuver/transport, Software is included.
They continue:
"The Scan Dimension’s scanner has an accuracy threshold of 0.1 mm, which is excellent considering the sub $1,000 price tag. Users can scan objects with SOL 3D’s proprietary software, which is included with the purchase of the device.
"Once a scan is complete, they can seamlessly export files in STL or OBJ format and import them for printing purposes. For those not interested in 3D printing, the SOL allows users to effortlessly upload scans to social media, as well.
"Due to its price point and high level of accuracy, the SOL 3D is perfect for a variety of applications. These devices can be used by hobbyists, teachers, and entrepreneurs."
Read the full review on heavy.com
About heavy.com: heavy is a global platform for the most sought-after news and information. Through its flagship website, Heavy.com, and Spanish-language platform, AhoraMismo.com, readers benefit from rapid, unbiased reporting to access the most sought-after news and information in real time.
In German, 3Dmake compares the top 12 3D scanners for enthusiastic makers labeling it "The ultimate overview of the current 3D scanners on the market and their differences!"
SOL 3D scanner is ranked #1.
"The SOL 3D scanner specializes in small and medium-sized objects. It has intuitive software - the focus is on simple operation.
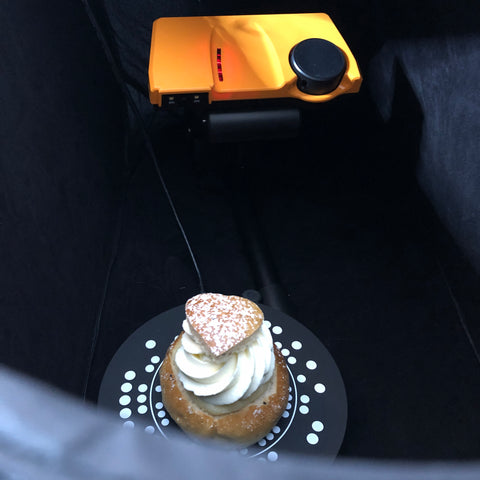
A scan takes about 25 minutes. A combination of laser triangulation and white light is used. This hybrid approach enables a maximum resolution of 0.1 mm. The SOL comes with an automatic turntable and thus an automated 3D scanning process. The turntable carries a weight of up to 2 kg."
Read the full review (in German only) on 3Dmake
About 3Dmake: 3Dmake is the new online magazine for 3D printing. 3Dmake reports regularly and daily on the latest technologies, 3D printers, designers, makers and applications. Our focus topics are: The latest 3D printers, 3D models and industrial applications of 3D printing.
3Dnatives did a comparison of 3D scanners under $8,000 (€7,000) and sorted the 11 scanners by increasing price.
SOL takes a 4th place:
"This scanner was developed by Scan Dimension, based in Denmark, and is essentially a hybrid solution. It uses a combination of laser triangulation and white light technology to 3D scan real-life objects. The SOL 3D scanner can provide a resolution of up to 0.1 mm. The 3D scanning process is automated and you can choose between a near and far scanning mode.
The SOL 3D scanner also includes software to simplify your entire workflow. In a few steps you will be sending your 3D model to your 3D printer. This is a solution meant for makers, hobbyists, educators and entrepreneurs who may not have the most experience with 3D scanning devices but still want to achieve great results."
Read the full review on 3Dnatives
About 3Dnatives: 3Dnatives is the largest international online media platform on 3D printing and its applications. With its in-depth analysis of the market, 3Dnatives gets over 1 million unique visitors per month and is currently available in English, French, Spanish, and German.
In All3DP’s spring update of their 2020 forecast of the 3D scanner market they mention the SOL 3D scanner as one of the seven best 3D scanners below $1000.
“The Scan Dimension SOL was created to be precise, portable, easy to use, and affordable. It’s geared towards hobbyists, everyday makers, and entrepreneurs,” All3DP writes and continues:
“It can handle a variety of applications, from replacing or matching broken parts to replicating unique items. It scans both the geometries of objects and their texture.”
All3DP is the leading 3D printing magazine and aims at both beginners and professionals.
Read the full review at All3DP
SOL is the best 3D scanner for easy replicas according to C|NET. They have found the best products within the 3D field for beginners and budget creators and have given the SOL 3D scanner a great review.
“… the accuracy is impressive, the turntable spins itself automatically, and even the color accuracy of your scan is going to be spot on,” C|NET writes.
Read the full article on C|NET
Scan Dimension has been named IDC Innovator for 2020. IDC stands for International Data Corporation – a company that provides global market intelligence for the IT and consumer technology markets.
According to IDC Scan Dimension and the SOL scanner is believed to be one in four companies to have largest impact on the 3D scanning market in 2020.
“We expect they will play a key role in expanding both the market and the capabilities of [3D scanners],” says Max Pepper, research analyst at IDC in their review of SOL.
IDC also writes: “Scan Dimension provides one of the most user-friendly and affordable 3D scanners available, which has helped to open the market to educators, hobbyists, entrepreneurs, and makers.”
Read the full review at idc.com
The IDC article is unfortunately removed from their website as of August, 2021.
]]>This software update combines SOL PRO Creator’s familiar intuitive interface and highly automated approach with a new live view of the 3D modeling process, as well as opportunities for users to step in at key stages. As a result, it’s made 3D scanning of symmetrical objects with few or no distinct features – a well-known challenge – faster and more accurate.
“At Scan Dimension,” explains Jacob Bendix, Global CCO of Scan Dimension, “we believe that whenever the scanners and software can do the hard work, they should. But we work closely with our users – their feedback is a key driver in development. What we heard is that many of them value a hands-on approach as much as they value a streamlined, easy-to-use process. We developed Creator 2.0 to give them both.”
The new SOL PRO Creator 2.0 software lets users see the scan in progress. The software shows a live view of the point cloud being built, which users can rotate and inspect.
Additionally, Creator 2.0 displays thumbnails of the automatically aligned point clouds after each scanning pass, so users can visually confirm proper alignment before the automated meshing process.
Just as before, SOL PRO Creator’s automated processes deliver consistently high-quality scans for asymmetrical objects with abundant scan alignment features. When it comes to highly symmetrical objects, however, users can now take action to shorten the path to a quality 3D model.
“Because symmetrical objects are notoriously difficult to scan, the new version of our software ensures users can review alignment before they commit time to meshing,” continues Jacob Bendix. “And when an adjustment is needed, we’ve made it easier to get that done.”
Version 2.0 also allows users to delete unneeded sections of the scanned object directly in the software. As always, artifacts and other loose or floating points are automatically removed.
Finally, Creator 2.0 offers greater flexibility. Users can now select the location where the file collection will be saved, making it easier to share files and manage data storage limitations.
“SOL PRO Creator 2.0 is about options,” Jacob Bendix explains. “As a result, this update doesn’t just benefit those who wanted more control over the process – it’s a value-add for everyone.”
Maximum accuracy |
0.05 mm (0.002 in) |
Calibration |
Automatic, with option to reuse last successful calibration |
Camera and texture |
8 MP camera captures color texture (HDR quality) |
Full process time per scanning mode* |
Full resolution: 15 min. (Normal), 20 min. (High accuracy) Medium resolution: 8 min. (Turbo) |
Options |
NEW Manual alignment, NEW Point cloud edit, Exclude texture, Dark or partially dark surface, Unsteady object |
Appending/adding scans |
Yes, automatic global alignment of added scans |
* Per complete 360° scanning pass including calibration, scanning, and meshing.
]]>
To help align the point clouds we developed the feature ‘Manual alignment’ as a unique option in SOL PRO Creator 2.0.
Watch the demonstration in the video below, where we scan a typical symmetrical shape: A block of foam.
Settings
Check the final 3D model in Sketchfab:
]]>
3D Printing Industry picked up on the launch of the updated SOL PRO Creator 2.0 software for the SOL PRO 3D scanner:
“3D scanner developer Scan Dimension has introduced SOL PRO Creator 2.0, a new software exclusively available for the SOL PRO 3D desktop scanner. The update includes a live view of the 3D modeling process, allowing users to intervene at crucial stages, in addition to the software’s familiar user-friendly interface and highly automated approach. As a result, it has made 3D scanning of symmetrical objects with few or no distinct features faster and more precise, which is a well-known challenge.”
Read the full review on 3dprintingindustry.com
About 3D Printing Industry: 3D Printing Industry (3DPI) is a global media company providing a dedicated resource for anyone interested in 3D printing and 3D scanning — two fields of technology that are rapidly growing in relevance and application across industrial and consumer sectors.
3D Printing Industry thoroughly reviewed our SOL PRO 3D scanner hardware and software and did a series of benchmarking and scanning tests, beginning the review with:
“Those seeking a turnkey 3D scanner need not look any further, as the SOL PRO is the complete package.”
One of the tests was comparing the SOL PRO 3D scanning of a 100 mm long cuboid to the original STL file. The result impressed 3D Printing Industry:
“For a system in this price range, this is a very small average imprecision and a very tight point cloud spread. To put this into context, when using this scanner you can expect 99.6% of your scanned points to be within -0.36 mm and +0.32 mm of their intended dimensions.”
The various 3D scanning tests were made with objects of different shapes and surfaces, and although some of these had surfaces that are generally hard to capture, 3D Printing Industry were excited about the ease of use, and the software workflow:
“There’s not much to say other than the fact that this works and it works well, the one-click scan approach is as easy as it sounds.”
Read the full review on 3dprintingindustry.com
About 3D Printing Industry: 3D Printing Industry (3DPI) is a global media company providing a dedicated resource for anyone interested in 3D printing and 3D scanning — two fields of technology that are rapidly growing in relevance and application across industrial and consumer sectors.
heavy.coms ranks SOL PRO in their list of best 3D scanner available in 2022, and explains that the pros are: Top-quality features and performance, Intuitive software included, Easy setup and durable design.
"This device takes everything that is great about the standard SOL 3D scanner and makes it better."
They are very enthusiastic about the SOL PRO software:
"This highly automated technology provides users with finished 3D scans that are ready to be imported for display or printing purposes. The Pro Creator software even has tools to assist with scanning dark surfaces or unsteady objects."
Read the full review on heavy.com
About heavy.com: heavy is a global platform for the most sought-after news and information. Through its flagship website, Heavy.com, and Spanish-language platform, AhoraMismo.com, readers benefit from rapid, unbiased reporting to access the most sought-after news and information in real time.
Scan Dimension SOL PRO 3D scanner: Is this the one?
SlashGear boldly kicks off their article about SOL PRO 3D scanner:
“A new 3D scanner appeared in the release schedule at Scan Dimension with an aim for top performance in a desktop sized machine.”
And continue:
"The SOL PRO has a scan time of 15 minutes and a turbo time of 8 minutes. Of course it all depends on what sort of detail you’d like to get, and the computer hardware you’re working with – overall processing time can change."
Read the full article at SlashGear
About SlashGear: Dedicated to highlighting the latest and greatest in personal technology since 2005, SlashGear covers everything from cutting-edge tech gear to the latest digital lifestyle trend. Distinctive, informative and fresh, we’ll keep bringing you device information and reviews you can trust as well as thought-provoking commentary.
Professional High-Accuracy Scanner Amplifies the Power of 3D scanning
Industry Analysts mentions SOL PRO in their article linked below:
"SOL PRO is an ideal 3D scanner for engineers and QA professionals, who can use 3D scanned objects to ensure exact copies of an original. SOL PRO 3D scanned objects can also be used for 3D printing or product inspection to ensure that manufactured parts comply with industry tolerance standards. For reverse engineering, users can scan replacement or discontinued parts when original drawings are unavailable."
Read the full review at Industry Analysts, Inc.
About Industry Analysts, Inc.: Industry Analysts, Inc. is a news and media firm focused on the AV, imaging, print and ECM industries. Since 1973, IA Inc. has helped keep manufacturers and resellers up to date on critical news, product information and industry trends. IA Inc. is a sponsored media source, publishing to 45,000 subscribers and followers with over a million views of their videos.
For makers and professionals:
In German, 3D-grenzenlos Magazin promotes SOL PRO 3D scanner with high accuracy scanning for hobbyist and professionals.
"The Danish 3D scanner manufacturer Scan Dimension presents the SOL PRO, a new professional 3D scanner in desktop format. This offers a scanning accuracy of 0.05 mm and is the successor to the SOL 3D scanner. We present the new SOL PRO 3D scanner in more detail," writes 3D-grenzenlos Magazin in German.
Read the full review in German at 3D-grenzenlos Magazin
About 3D-grenzenlos Magazin: The 3D limitless magazine is an independent online magazine for 3D printing. Since 2013, the 3D limitless magazine has been reporting on the development of 3D printing worldwide. Several thousand news articles, product presentations, innovations, tests and knowledge collections have since been published on additive manufacturing.
]]>In short: When the scanner’s laser and camera can’t detect the surface of your object it needs 3D scanning spray.
There are various kinds of 3D scanning sprays on the market, and the biggest difference is that some sprays you need to rinse off yourself, while others vanishes after a few hours. Which to choose is a personal choice.
Before and after spraying a partly shiny object with 3D scanning spray. Tip: Spray only enough to tone down the shine.
View how the 3D model of the 3D scanned object turned out. Note how the texture will also show the 3D scanning spray and also how we only used a thin layer to ensure the 3D scanning spray will not show in the wireframe result.
Open live 3D view on Sketchfab
Watch the video to get an understanding of what 3D scanning spray is and when it should be used.
We have listed some unusual but easy-to-find alternatives to 3D scanning spray, if you don't have a 3D scanning spray at hand, and need it now - these are not all tested by us, but input from our users.
Please remember to check the affect on the surface before use and use at your own risk:
You can find more about home-made 3D scanning spray in 3D INSIDER's article about 3D scanning spray.
3D scanning spray is needed when the nature of the object’s surface prevents the laser beam to return to the scanner accurately, causing distortion in the final 3D model.
Since SOL and SOL PRO 3D scanners work differently, there is a slight difference in when 3D scanning spray is needed - for other 3D scanners it will be different too.
The ‘Dark or partially dark surface’ option in the SOL PRO Creator software sometimes also handles shininess, so make a test scan in the faster turbo mode, when in doubt.
SOL PRO: Use 3D scanning spray when the the object’s surface is fully or partially
Read more: How to scan various surfaces and shapes with SOL PRO 3D scanner
SOL 3D scanner does not have an option to handle dark surfaces, so dark surface is added to the list of objects needing 3D scanning spray.
SOL: Use 3D scanning spray when the the object’s surface is fully or partially
Read more: How to scan various surfaces and shapes with SOL 3D scanner
You can also find help for other 3D scanning spray types in our Knowledge Base article: How to use powder or spray when scanning.
For our blog and scanning we used the AESUB Orange 3D scanning spray which vanishes within 12-24h after coating. Read more on AESUB's website.
The first webinar is now available on YouTube and you can go straight to a topic of your interest by clicking on the timestamp.
00:00 3D scanning Q&A webinar
00:37 SOL/SOL PRO: Do I always need to scan inside the tent to get good results?
02:40 SOL PRO: Can I manually mesh my scanning passes of the same object?
04:30 Video: SOL PRO: Scanning symmetrical objects using ‘Optimize alignment’
07:50 A dive into the content of the Scan Dimensions YouTube page
08:52 What is the difference between SOL and SOL PRO? And why would I want one over the other?
12:09 SOL PRO exclusive features: Options for scanning dark surfaces and unsteady objects
13:34 3D scanning spray explained
16:28 How to become a reseller
17:18 Where to find support for SOL
17:34 Where to find support for SOL PRO
18:03 Types of technical support issues
19:02 What can you find in Knowledge Base?
19:50 SOL/SOL PRO: Tips about power
21:09 SOL/SOL PRO: Which are macOS supported?
Subscribe to our YouTube channel.
Sign up to receive e-mails with inspiring examples, tips, and tricks for 3D scanning.
]]>The technology in SOL scanners rely on the laser being reflected back to a sensor. However, if the object’s surface is very dark, it may absorb too much of the laser energies and, as a result, the sensor may not get enough information to adequately 3D model the shape it is scanning. This is a typical issue for all 3D scanners.
In this case, we were excited to see how the dark surface of the cake would scan.
Read more about scanning various surfaces and shapes
The rum ball was approx. 5 cm (2 in) in diameter, a size that fits perfectly with the SOL 3D scanner set in near position, and to get as much detail as possible, we chose the normal scanning mode.
Also, we challenged ourselves to see if we could get the whole cake captured in only two scanning passes.
The cake was also a little soft and may have shifted its shape slightly during the repositioning to the second orientation, but SOL 3D scanner managed to scan it just perfectly. Even after someone took a bite.
Inspect the rum ball and all our other uploads on Sketchfab. If you make a free account you’ll also be able to download them.
Sketchfab 3D model: Rum ball with a bite
The ‘romkugle’ (rum ball) is a Danish invention where bakers take yesterday’s un-sold leftover chocolate cake and pastry, mix them with jam and rum essence, and roll the little balls in chocolate sprinkles. Initially created to reduce cake waste, the bakers were essentially ahead of their time in sustainability-thinking.
It is very common in Danish workplaces to have a day a week where cake is served. Last week the Thursday cake in our office was rum ball and being in the 3D business we needed to immortalize the delicious cake.
The average rum ball weighs around 80 gr (2.8 oz), and to burn off the calories you would have to either swim 35 minutes, run 31 minutes, bike 43 minutes or walk 100 minutes.
However, it is worth it.
Source (Danish only): https://romkugleconnoisseur.dk/fun-facts/
See how our scanning of another traditional cake turned out: Valentine’s day semla
]]>Some surfaces and shapes require preparations before they will 3D scan successfully. We have made the simple guide below.
Note that for some objects this applies to both surfaces and shapes.
No preparations required.
Go ahead and scan.
Enable the ‘Dark or partially dark surface’ option in the SOL PRO Creator software before scanning.
Add developer spray before scanning.
If too fuzzy, fur is generally not 3D scannable.
Enable the “Unsteady object” option in the software to add a pause after each turntable rotation.
If the object stays motionless once positioned, it will scan if only one scanning pass is required.
When adding additional scanning passes, the repositioning may change the overall shape and thereby corrupt the scan.
(Bottom of) holes that are not visible to the camera and laser will not be part of the final 3D model.
If the software did not align your scanning passes correctly, click on ‘Optimize alignment’ to help align the point clouds.
The minimum scannable size with SOL PRO is 20x20 mm (diameter x height) with the scanner set in near position.
The maximum scannable size with SOL PRO is 170x170 mm (diameter x height) with the scanner set in far position.
Moving or touching the scanner or tent while scanning will most likely result in inaccurate or failed scans. Place the tent on a separate table to secure stability.
1.- Always power your computer
2.- Use USB 3.0 ports (if USB hub is used, this must be powered)
3.- Place the scanner inside the tent and cover with the cloth
See how to scan various surfaces and shapes using SOL 3D scanner.
Note that for some objects this applies to both surfaces and shapes.
No preparations required.
Go ahead and scan.
Add developer spray before scanning.
If too fuzzy, fur is generally not 3D scannable.
Use modelling clay to fixate the shape to the turntable. (Needs removal in third-party software).
Fixate the movable parts, for example with glue. (Do not glue it to the turntable.)
If the object stays motionless once positioned, it will scan if only one scanning pass is required.
When adding additional scanning passes, the repositioning may change the overall shape and thereby corrupt the scan.
(Bottom of) holes that are not visible to the camera and laser will not be part of the final 3D model.
Attach modelling clay to make the shape asymmetrical. (Requires removal in third-party software).
The minimum scannable size with SOL is 25x25 mm (diameter x height) with the scanner set in near position.
The maximum scannable size with SOL is 170x170 mm (diameter x height) with the scanner set in far position.
Moving or touching the scanner or tent while scanning will most likely result in inaccurate or failed scans. Place the tent on a separate table to secure stability.
1.- Always power your computer
2.- Use USB 3.0 ports (if USB hub is used, this must be powered)
3.- Place the scanner inside the tent and cover with the cloth
See how to scan various surfaces and shapes using SOL PRO 3D scanner.
]]>In its review of SOL 3D scanner, 3D Printing Industry is very pleased with the scanner's usability, proclaiming:
“We’ve never come across a 3D scanning workflow this automated.”
3D Printing Industry took SOL through to a series of tests, and was positively surprised by the results of both precision and benchmarking tests as well as the overall usability of both hardware and software.
Their verdict of scanning tabletop models 3D printed in a matte grey resin:
“For a scanner in this price range, all of the models came out definitively clean – a big win for the SOL.”
This test involving the scanning of a 100 mm long benchmarking cuboid of known dimensions showed a precision with an average offset at -0.0421 mm with a standard deviation of 0.2127 mm.
This means that 99.6% of the scanned points lie between -0.68 mm and +0.60 mm of their intended dimensions.
“Considering the price point of the scanner, this is a great result.”
“What SOL really provides is value for money – pure and simple."
Read the full review on 3D Printing Industry’s homepage:
Scan Dimension SOL – Fully-automated desktop 3D scanning
Just contact us. We’re happy to help.
Visit our SOL product page.
]]>3D Printing Industry thoroughly reviewed our SOL PRO 3D scanner hardware and software and did a series of benchmarking and scanning tests.
One of the tests was comparing the SOL PRO 3D scanning of a 100 mm long cuboid to the original STL file.
The result impressed 3D Printing Industry:
“For a system in this price range, this is a very small average imprecision and a very tight point cloud spread. To put this into context, when using this scanner you can expect 99.6% of your scanned points to be within -0.36 mm and +0.32 mm of their intended dimensions.”
The various 3D scanning tests were made with objects of different shapes and surfaces, and although some of these had surfaces that are generally hard to capture, 3D Printing Industry were excited about the ease of use, and the software workflow:
“There’s not much to say other than the fact that this works and it works well, the one-click scan approach is as easy as it sounds.”
Read the full review on 3D Printing Industry’s homepage:
Scan Dimension SOL PRO – Streamlining the desktop 3D scanning workflow
Just contact us. We’re happy to help.
Fill out the form on the SOL PRO product page and we'll get right back to you.
]]>Scan Dimension, developer of 3D scanning solutions, announces that its SOL PRO scanning software has received a significant upgrade.
SOL PRO Creator and SOL PRO Viewer for Scan Dimension’s professional-level 3D scanner already let users achieve top-quality 3D scanning results with minimal user intervention. The following new features make the process of scanning and inspecting objects even more powerful:
Several features have also been improved:
“With this software upgrade, SOL PRO becomes even easier to use and more powerful for inspection. These improvements will keep SOL PRO at the forefront of the 3D scanner market in terms of ease of use and quality of results,” comments Jacob Bendix, Chief Commercial Officer, Scan Dimension.
SOL PRO Creator and SOL PRO Viewer software are designed exclusively for SOL PRO, one of the most accurate 3D desktop scanners in its class for product inspection of volume, surface area, shape, and size with metrology-grade accuracy. The easy-to-use software automates the entire 3D scanning process, utilizing a combination of true laser space conversion and white-light technology to achieve effortless, high-quality results, making SOL PRO a perfect partner for inspection, quality assurance, prototyping, and reverse engineering.
For more information on where to buy or how to become a Scan Dimension distributor, email us at contact@scandimension.com.
About Scan Dimension
Scan Dimension is a division of Global Scanning A/S, a Denmark-based market leader with 30+ years of experience in imaging technologies that boasts such top brands as Contex and Colortrac. Visit www.scandimension.com for more information.
Contact
Jacob Bendix
Chief Commercial Officer
Scan Dimension
contact@scandimension.com
Volume inspection of your scanned 3D object is fully automatic with SOL PRO. No need to export to third-party software for measurements and calculations. The software options make the process easily replicated to ensure measurement consistency.
All you need to do is perform a regular scan, save the 3D model, and the volume inspection result is readily available in cubic cm and cubic in.
The workflow below describes the simple steps needed for a successful volume inspection process.
As an example, we have chosen to scan a cube, since the volume of this kind of shape is easily double-checked with a caliper.
The cube measures 7,4x5,9x2,7 cm (2,91x2,32x1,06 in), and this object size requires the scanner set in near position.
Learn more about near or far scanner position here.
For volume inspection, we recommend that you start out by testing if scanning in Turbo scanning mode is accurate enough for your need. Scanning in Turbo scanning mode will save time, but at a slight cost of accuracy.
If you need more accuracy, then make test scans in Normal and/or High accuracy scanning modes, and choose which works best for you.
If you do not need the texture as part of your volume inspection, you can reduce the full scanning process time by 10-15% by checking the ‘Exclude texture’ option before scanning.
Follow the instructions in SOL PRO Creator software and complete the first scanning pass for your volume inspection.
VIDEO: Learn the full scanning process from this blog post featuring the video: A SOL PRO 3D scanning from start to finish.
A scanning pass is a scanning done with the object placed in one orientation.
SOL PRO Creator can mesh up to five scanning passes, but you only need to make just as many scanning passes necessary to cover the entire object’s surface once.
For volume inspection, you would typically need at least two scanning passes, so that the part of your object that was facing down in the first scanning pass is also scanned.
When you have scanned sufficient orientations, you name and save the file, which then automatically opens in the SOL PRO Viewer software.
The volume of your 3D model is read at the bottom of the screen in SOL PRO Viewer alongside other model information and measurements.
This applies to all 3D models opened via the Collection in SOL PRO Viewer.
A bad alignment will give you an inaccurate volume result. So, in case your object is not aligned well enough by the automatic meshing, you may need to use the Optimize alignment option.
VIDEO: See how to optimize the alignment in this blog post: Scanning symmetrical objects using ‘Optimize alignment’
If your volume inspection includes comparison of various 3D models, then make sure that they have been scanned using identical parameters (scanning mode, scanner position, no of scanning passes, etc.).
We’re happy to help: Just contact us.
Fill out the form on our SOL PRO product page and we'll get right back to you.
]]>Compared to traditional measuring tools like calipers and coordinate measuring machines (CMM) you get a complete set of data from 3D scanning without extensive preparations.
SOL PRO 3D scanner instantly calculates volume and surface area for organic shaped objects, and minimize errors measuring objects made of soft material where measuring tools may affect the size.
SOL PRO 3D desktop scanner is easy to assemble and operate and the software solution only needs a few mouse clicks to complete a scan. So it’s a very simple task to 3D scan your part or product and get it ready for further measurements.
Watch this video to see how to make a 3D scanning from start to finish with SOL PRO
After 3D scanning you get surface area and volume results right away. Saving the model in .obj or .stl file format makes it easily accessible for comparison and measuring in third-party software.
SOL PRO Creator software gets you smoothly through the complex process of 3D scanning and lets you make 3D scans in very few steps.
We have automated both the calibration, the scanning and the meshing processes. The only true interaction with the scanner is when you turn and rearrange your object to scan additional orientations.
After scanning you can read the volume and surface area directly in the SOL PRO Viewer software and also save your model for third-party software.
You can easily compare your 3D model to the original, using your preferred 3D software. In this example, we have used CloudCompare, a great simple tool for comparison of the original 3D model and the SOL PRO 3D model.
A 3D comparison like this lets you see if the scanned 3D model differs from the original drawing. This model has a small square cavity that cannot be 100% captured by a 3D scanning, and you can see the difference (blue).
If you are only interested in measurements of parts of a model or specific points, you can open your scanned 3D model in any 3D tool and take measurements of a specific distance to verify it is within specs.
A great advantage of measuring using SOL PRO 3D scanner is that you are able to keep the 3D model for measurements in the future. Or as reference for that specific part or product.
]]>
And then we scanned it, of course.
Check out the 3D model in Sketchfab.
Happy scanning and happy holidays!
If you have any questions, please just write us a note. We’re happy to help.
]]>
Learn how in this video, or read the solutions below.
Note that even though the video features SOL PRO 3D scanner, you can apply most of these scanning speed improvements to other desktop sized 3D scanners, including SOL.
Since SOL PRO does all signal processing in your computer, not in the scanner, you need to check if your computer meets the recommended – or at least the minimum – system requirements.
SOL’s signal processing is taking place in the scanner, but there are still minimum system requirements that needs to be met.
The faster the computer, the faster the scanning time.
System requirements:
Make sure to plug your computer into power. Scanning on battery power will slow down your computer – even if the battery is fully charged.
Not all USB ports live up to specs even though they claim USB 3.0 or SuperSpeed. Try switching your SOL PRO or SOL to another USB 3.0 port either in your computer or in a powered USB hub.
If you have a Windows computer, change your Graphics settings to High performance.
If you have a laptop, set the battery settings to ‘Best performance’.
Performing multiple tasks and working in several programs at the same time can slow down your computer and scanning speed.
Quit or pause any other tasks and programs to send more power and performance in the direction of the 3D scanning.
If you don’t need your 3D model in full resolution, you should select the Turbo scanning mode. This will double your scanning speed.
Also, note the option to reuse the last successful calibration and save time.
How to change scanning mode:
And speaking of time …
Be aware that the estimated process time in the software is based on previous scannings.
It takes a couple of scannings before SOL PRO Creator and SOL Creator has learned how to tell time accurately on your computer.
If you have any questions, please just write us a note.
We’re happy to help.
Fill out the form on our SOL PRO product page and we'll get right back to you.
]]>Let the high accuracy (up to 0.05 mm), the laser technology (True laser space conversion) and the better camera (8 MP) of SOL PRO 3D scanner assist you in: quality assurance, product inspection, prototyping, and 3D printing tasks.
The workflow is still simple: Just go ahead and calibrate, scan, mesh - all automated processes in SOL PRO.
See here how you convert a real-world object into 3D model using SOL PRO 3D scanner.
Don't need high accuracy and speed? Read our blog post about scanning with SOL 3D scanner here.
The scanning with SOL PRO is of an ear impression made from a soft silicone-based material. It measures 30x23x38 mm (1.2x0.9x1.5 in).
Move the slider to switch between the original (left) and the final 3D model (right):
See the video detailing how to get from original to final 3D model with SOL PRO Creator 2.0:
If you have any questions, please just write us a note. We’re happy to help.
We developed SOL 3D scanner with this in mind: A very easy-to-use solution for creating digital copies of real-world objects - with as many automated processes as possible. Easy setup, intuitive software, no manual cleaning of 3D models.
This blog shows you a real-world object turned 3D model using SOL 3D scanner.
Need higher accuracy than 0.1 mm? Read our blog post about a 3D scanning with SOL PRO here.
The scanning with SOL uses a small bird’s skull as an example. The skull is 53x30x27 mm (2.01x1.18x1.06 in).
Move the slider to switch between the original (left) and the final 3D model (right):
See the video detailing how to get from original to final 3D model with SOL:
If you have any questions, please just write us a note. We’re happy to help.
While you can just go ahead and scan with normal and turbo scanning modes without any further ado, scanning in high accuracy requires a profiling procedure. The short process is an automated part of the included software.
As part of the production, a highly advanced calibration robot executes part one of a special calibration process on every single SOL PRO 3D scanner. Part two is performed by the user utilizing a unique cylindrical target that enables the scanner to scan with an exceptionally high accuracy of up to 0.05 mm.
Watch this 2 minute video on how to make or update a high accuracy profiling:
Always:
Every two weeks:
In an optimal setting where the scanner is not moved, shook or relocated, and the room temperature stays exactly the same, then, in theory, the scanner would continuously perform with an accuracy of up to 0.05 mm with no update needed.
However, an optimal setting is hardly obtainable. So make sure that you update the high accuracy profiling according to the above guidelines to keep your scanner’s performance in high accuracy mode.
Happy scanning!
]]>With SOL PRO we have built on the solid success of SOL – pushing the boundaries of both hardware and software to get the maximum out of a desktop sized 3D scanner.
SOL PRO integrates seamlessly into any 3D workflow. The precision and ease-of-use make it the perfect partner for quality assurance, product inspection and prototyping. And it’s also an ideal addition to 3D printing tasks.
Beside the Normal scanning mode, you can choose to focus on accuracy or speed. Select the High accuracy scanning mode to scan with an accuracy as high as 0.05 mm. Or double the speed with the Turbo scanning mode. In just 8 minutes, your 3D model is ready.*
The SOL PRO software includes smart options for scanning dark surfaces and unsteady objects – all you have to do is tick the checkboxes.
SOL PRO scans small to mid-sized objects with heights and diameters of minimum 20 mm (0.8 in) and maximum 170 mm (6.7 in).
Fill out the form on our SOL PRO product page and we'll get right back to you.
* 3D scanning requires fast computer hardware. Check the SOL PRO system requirements.
]]>3D scanning includes handling large files and performing heavy background tasks and that requires a lot from your hardware.
To check if your hardware is up to scanning with SOL, see our system requirements.
You need to two functioning USB 3.0 ports either on your computer or on a powered hub. These are marked with the SuperSpeed symbol and the port may be blue.
If SOL is not working even though you have it connected via powered USB 3.0 ports, you should check if these are broken and/or do not output enough power.
SOL requires Internet access to get factory data, and if your scanner is registered, you ensure that your software is always up to date.
SOL scans objects with a diameter and height of minimum 25 mm (1 in) and maximum 170 mm (6.7 in).
The optimal diameter and height is between 25 and 100 mm (1-3.9 in) and is scannable with SOL set in near position. Scanning larger objects up to 170x170 mm requires SOL set in far position and thereby reducing the resolution and accuracy.
Objects smaller or larger than these sizes may not scan optimally.
A successful scan depends somewhat of the object’s surface.
The best objects to scan are:
Problematic objects to scan are:
You may solve issues with dark, shiny or transparent objects by spraying them with developer spray before scanning. And you can attach something to symmetrical objects to make them asymmetrical.
The time it takes SOL to perform a 360 degrees scanning pass, including automated calibration and meshing, depends mainly on your computer hardware.
An object scanned with the recommended hardware takes about 20-25 minutes to complete.
However, if your hardware only meets the minimum requirements, you may experience a total scanning time of up to 45 minutes per scanning pass for the exact same object.
In either case, you can reduce the scanning time by more than 50% if you select the Turbo mode. This however, reduces the resolution.
See the minimum and recommended hardware requirements for SOL.
The two most important questions are:
If you have any questions, please just write us a note.
We’re happy to help.
So says hobby sculptor Jaime Laguna from Puerto Rico in this interview on how he uses SOL 3D scanner in his sculpturing process, what his challenges are, and how he solves them.
Meet one of our most inspiring SOL 3D scanner users in this video, or read the transcript below.
Sigrid Raahauge, Scan Dimension:
You are about to meet one of our most inspiring SOL 3D scanner users.
My name is Sigrid Raahauge and I am the marketing team leader in Scan Dimension, the Copenhagen office.
I was so lucky to interview Jaime Laguna who has used the SOL 3D scanner for one year and has made some very creative projects. He will share some of his best tips and tricks for 3D scanning with the SOL scanner and of course show some of his projects.
I hope you will enjoy the interview.
Jaime Laguna, Puerto Rico:
My name is Jaime Laguna, I live in Vega Baja, Puerto Rico. My hobbies are robotics and sculpturing.
In the past, I only made sculptures with clay. I have a kiln, an oven for clay. But when I discovered 3D printing, and later 3D scanning... Those technologies made my life a lot easier.
In the past, when I was making a clay sculpture, it could take me a whole day. Now I can scan or design the sculpture in about 30 minutes to one hour, and let the machines do the hard work.
Technology and the creative process
My most favorite theme is wreckages.
I made this little boat with self-hardening clay. Then I scanned it and 3D printed it. This is the scan of the original.
I compile the file to an .stl file. My software [MatterControl] can open the file. I can stretch the file in any axis I want. Larger, or taller or wider. I can make it in any shape I want.
Here is another thing I scanned. This was a little difficult, because it has a glossed glaze and the scanner has difficulties scanning the item.
When I first scanned the pottery, there were distortions of the legs.
To kill the gloss, I used this scanner spray from Germany, AESUB Blue. It self-disappears. Just spray the item, and in a few hours, it disappears completely. You do not need to wash the piece or remove the spray, because it disappears automatically.
And then, after I scanned this piece of pottery, I stretched it in the X- and Y-axes. But, I was not happy with that. So, I stretched the file a lot and made a boat!
Still not happy enough. So, I scanned some pieces of wood that I found on the beach, and merged with the boat. And got this wreckage. This is my favorite.
So, I can merge the different files and I can make anything I want. The file, the scanning and the software let me play the way I want. So, I can make the sculptures that I like the most.
Tips and tricks for optimal 3D scanning
You asked me if I have some tips.
For example, if I am scanning a piece of wood, I make it stand up using modelling clay on paper, so the modelling clay does not stick to the turntable of the scanner.
By experience, it is a lot better to scan an object like this in this direction than this. It’s easier. You need less scans, and the scans are watertight.
But don’t worry, I will also find a way to play with non-watertight scans.
Sigrid Raahauge, Scan Dimension:
You get the modelling clay in the scan as well, right?
Jaime Laguna, Puerto Rico:
That depends. For example, if I use blue modelling clay, the object appears to float in the scan. That is because the clay is very dark. But if I use a light colored modeling clay – like yellow – the base will appear in the scan.
Usually, with this type of object, I do not care about the bottom. I cut it in the slicer anyway.
So, it’s just playing with the methods and the processes. And you will eventually find a process that works fine for you. For what you want to do.
You have to be a little patient, innovative and creative to get the results that you want.
Final thoughts about SOL 3D scanner
Would I like to recommend this scanner? Definitely, yes! I love this scanner. It made my life easier.
Happy scanning!
]]>
As a minimum, your object should fill out the space between the small dimples and the centre hole. Object this small should always be scanned with the SOL scanner set in near position.
If your object sort of fits within the printed circle you should scan your object with SOL set in near position.
Near position:
Objects 25-100 mm (1-4 in) in diameter and height.
When your object’s height and diameter as a maximum is slightly bigger than the turntable diameter, you should scan with SOL set in far position.
Just note that scanning in far position may lower the accuracy.
Far position:
Objects 70-170 mm in diameter and 80-170 mm tall (2.75-6.7 inches in diameter, 3.2-6.7 inches tall). Objects scanned in far position may lower the accuracy.
Your object may scan fine even if it’s somewhat bigger or smaller than the recommended sizes for near and far position, and it’s not that the scan will necessarily be bad if it’s scanned with SOL in the “wrong” position. For some objects you may wish to try scanning in both near and far position to see which is better for your particular object.
Give it a try – and happy scanning!
]]>
A scanning pass is a scanning done with the object placed in one orientation. For some purposes, one scanning pass of an object is fine.
However, most often you need to make more than one scanning pass to ensure a complete 3D model of your object.
But, what if you already saved and closed your model?
Don’t worry.
Here’s a recipe and a video on how to add additional scanning passes to an existing model:
* Note that, as the name implies, SOL Viewer is for viewing only, so make sure that you access the collection through SOL Creator.
You can see how it’s done in this video:
Comparison of same 3D model with 1 or 2 scanning passes
SPECS:
How does the software add scanning passes?
The scanning passes are automatically combined in SOL Creator.
The advanced software automatically aligns the multiple scanning passes into one model.
It also removes any unwanted artifacts from every single scanning pass, so the final model highly resembles the object that you chose to scan. And nothing else.
Happy scanning!
But hey! It’s Valentine’s Day, we love cake, and we love a good challenge. So, let’s scan and share the love!
]]>But hey! It’s Valentine’s Day, we love cake, and we love a good challenge. So, let’s scan and share the love!
We chose to scan the fantastic Valentines semla cake from the 5 star Juno the Bakery started by a former Michelin Noma cook. Scanned with love on the SOL 3D scanner.
Spin the cake around to watch it from all angles:
Drag the slider to compare scan to photo.
The cake we scanned is a traditional semla – but with a heart shaped Valentine’s Day lid.
A semla is a traditional sweet roll made in various forms in Sweden, Finland, Estonia, Norway, Denmark, the Faroe Islands and Iceland.
It is associated with Lent and especially Shrove Tuesday in most countries, Shrove Monday in Denmark, parts of southern Sweden, Iceland and Faroe Islands or Sunday of Fastelavn in Norway.
In Sweden it is most commonly known as just semla, but is also known as fettisdagsbulle, literally "fat tuesday roll".
Source: https://en.wikipedia.org/wiki/Semla
Valentine’s Day
Valentine's Day, or St Valentine's Day, is celebrated every year on 14 February.
It is the day when people show their affection for another person or people by sending cards, flowers or chocolates with messages of love.
The day gets its name from a famous saint, but there are several stories of who he was.
The popular belief about St Valentine is that he was a priest from Rome in the third century AD. Emperor Claudius II had banned marriage because he thought married men were bad soldiers. Valentine felt this was unfair, so he broke the rules and arranged marriages in secret.
When Claudius found out, Valentine was thrown in jail and sentenced to death. There, he fell in love with the jailer's daughter and when he was taken to be killed on 14 February he sent her a love letter signed "from your Valentine".
Source: https://www.bbc.co.uk/newsround/16945378
Oh, and this particular specimen was from the lo-fi “Juno The Bakery” opened by a former Noma pastry chef.
And yes, it was a very, very good cake. Now available in 3D only.
]]>Such a great season and with Halloween and autumn comes all the beautiful pumpkins and winter squashes. We found a great variety called sweet dumpling squash and thought it was perfect for scanning.
This is also an example of how the scanner performs in turbo mode scanning.
Look at the example scans below and let us know on Facebook or Instagram what you think!
]]>
3D scanning is a great way to save memories and share them with others either as 3D files or for 3D printing.
]]>3D scanning is a great way to save memories and share them with others either as 3D files or for 3D printing.
"I cannot bear the thought of not having this cast of my son's hand. It's a memory of the size he had as a 2-year old, and brings past experiences to life in a different way than images do," says the owner of this cast.
Now we have digitized the cast for saving and for printing in 3D and gift to other family members.
Back to scanning. The scanning was done on the SOL 3D scanner.
The specs for the scan:
Watch the 3D scanning result in the preview below - you can spin the model around to watch it from all angles.
Want to see another example of a 3D scanning? Read this blog post: 3D scan compared to real model
Thanks for reading and happy scanning.
Interested in the SOL 3D scanner? Take close look on this page: SOL 3D scanner
]]>We show you the answer in this blog post.
]]>We show you the answer in this blog post. The rooster figurine we use is full of colors and intricate forms and is perfect for an example scan.
First, is a photo taken just before we scanned. In the background, you see the SOL 3D scanner placed inside its tent and set to near scanning position.
The first scanning pass is done with the rooster on its feet. The scanning happens inside the tent, so we look at the scanning through the software where this screen recording is from.
A scanning pass consists of 10 sweeps. The rooster is turned 1/10 of a round before each new sweep.
We also did a second scanning pass with the rooster on its right side to make sure the bottom parts were scanned as well.
After looking at the result we could see an area below the right wing that was not detected by the scanner in either of the scanning passes. So we added a third scanning pass with the rooster on its left side. Each scanning pass takes approximately 20 minutes depending on the computer.
Now the SOL Creator software meshes the 10 sweeps for each scanning pass and also meshes the scanning passes together. This is an automated process and we have done zero manual clean-up.
When we say the SOL scanner workflow is calibrate - scan - mesh - done we really mean it.
The scanning is now finished.
Note that it is always possible to add more scanning passes even after finishing.
Below is your chance to look at the result in 3D.
You can change the layers - ie. set it to wireframe to see the triangulations and the scanning result without colors.
]]>
In this post, we'll walk through the process of scanning, editing, and printing a family heirloom to make a new keepsake ornament that our children can enjoy without fear.
]]>In this post, we'll walk through the process of scanning, editing, and printing a family heirloom to make a new keepsake ornament that our children can enjoy without fear.
Our heirloom is a hand-crafted ceramic teddy-bear made by our grandmother that we would like to share with the next generation, but it is very fragile.
We'll use our standard scan-to-print approach for capturing a suitable copy of the bear, but we'll also use a few software tools before printing to modify the teddy-bear and turn it into an ornament we can hang on our tree.
We'll scan the bear in far-mode due to its height, and we're only going to need a single pass scan, since he has a flat bottom anyway.
The SOL Viewer application will launch after the scan is completed to allow us to evaluate our scan results. We like to use a few of the different rendering options to evaluate our overall scan. We'll also upload a copy of the scan to P3D so we can easily access it from multiple computers.
We're going to do some modifications of the scanned bear before we print it, so will export it in OBJ format for now, though and STL export would also work. Alternatively, you can upload the OBJ file to P3D (our included model sharing service) and then download the scan on another computer.
MeshMixer is an easy-to-use editor that will allow us to easily scale our scan down to suitable dimensions for use as an ornament, and to add a loop to the top of the model for easy hanging.
If you don't have MeshMixer, you can get a free copy from Autodesk at http://www.meshmixer.com/
We decided our bear ornament should be about 65mm tall to look good with our other ornaments, so use the Edit > Transform panel to re-size the Z axis to 65 mm after making certain the "Uniform Scaling" option is checked.
In addition to re-sizing our model, we want to add a loop to make hanging it on the tree easy without drilling or glueing.
We'll do this by adding a torus (ring) object from the Meshmix selector to our scene, and then scaling it and positioning it atop the bear's head.
Once we have the ring sized and positioned correctly, we'll combine the two objects and make a single solid object.
We'll then hollow out the combined object to minimize how much printer filament we'll use when printing.
We'll now export from MeshMixer to our Slicer software. We could print directly from MeshMixer if our printer is set-up and we've loaded the correct profiles into MeshMixer. However, our preference is to use a different package for slicing and printing that gives us a little better control over our final output.
Since we're using Simplify3D for slicing and printing our object, we'll import the STL file we create in MeshMixer during the export step into that package.
We want to make multiple copies of our ornament, so will use Simplify3D to copy and position the objects for printing in a single pass.
The Center and Arrange button will place the three copies on our print-bed for us automatically.
Next, we'll add supports.
We'll also print with a raft, since one heel of the scan is slightly lower than the other. Based on experience, this will improve our print results.
Once we are happy with our preparation, we can start the printing.
After printing and clearing away the supports, we can paint our ornaments and have a lasting memento of a favorite keepsake, without risking the original.
If you would like to see the entire process, end-to-end, here is a video showing the complete process.
]]>This mom, Amy, is a talented developer by day and hobbyist by night. She has a passion for making ceramics, clay sculptures and keepsakes. As the holidays quickly approach, she is wanting to do a project with her son, Jett, for his grandma. She wants something personal and special using her talents and his new-found talents from his school's STEM learnings.
]]>
See how SOL 3D scanner can help make custom presents for all the grand-parents. Watch a child create a sculpture, scan, scale, and print it, then make it into a unique gift. See how in this article.
This mom, Amy, is a talented developer by day and hobbyist by night. She has a passion for making ceramics, clay sculptures and keepsakes. As the holidays quickly approach, she is wanting to do a project with her son, Jett, for his grandma. She wants something personal and special using her talents and his new-found talents from his school's STEM learnings.
It is a tradition of their family to collect tree ornaments every year for each child. She decides that anyone can buy some decor, but using their talents to make something to cherish is a lot more satisfying and personal.
She decides that she is going to do an art piece replica, which will be transformed into a smaller size ornament.
Let's show how this masterpiece was created.
Mom and son molded some clay into a baby dinosaur being hatched.
After sculpting the clay is allowed to dry exposing a solid, sturdy and adorable baby dinosaur hatching from an egg.
Jett continued to scan the dinosaur. Once completed he called his brother over to see the results in the SOL Viewer.
The results are amazing. The dino was scanned using SOL in near-mode. 3 scan passes were made of the piece, two in an upright position and one lying down on the turn-table in different orientations.
They then exported the file using the SOL Viewer into OBJ format to prepare for 3D printing.
They uploaded the OBJ to Sculpteo to be 3D printed and scaled-down the object by 50% using Sculpteo's tools.
Note: The model could have just as easily been sent to their own 3D printer.
The 3D printed dino was received in the mail. Notice how it was scaled to 50% smaller to be the perfect size ornament.
Connor secures a string, using super glue, on the dinosaur for easy tree hanging.
Jett uses paint pens to decorate the ornament.
Jett loved packing the box with this handcrafted treasure, knowing that he would be putting some math, science, and craftsmanship into his Grandma's tree.
Grandma loved the keepsake and immediately hung it on the tree.
]]>